This blog post continues the series of examples through which we want to show various technologies that can be used as a data source to power a Lightstreamer Data Adapter and, in turn, dispatch the data to multiple clients connected to the Lightstreamer server all around the internet.
We have already published a post where we dealt with the integration with DynamoDB: “Virtual Airport Demo: Connecting DynamoDB to Lightstreamer.”
In this post, we will show a basic integration with Apache Kafka.
Kafka and Lightstreamer
Apache Kafka is an open-source, distributed event streaming platform that handles real-time data feeds. It is designed to manage high volume, high throughput, and low latency data streams and can be used for a variety of messaging, log aggregation, and data pipeline use cases. Kafka is highly scalable and fault-tolerant and is often used as a backbone for large-scale data architectures. It is written in Java and uses a publish-subscribe model to handle and process streaming data.
Lightstreamer is a real-time streaming server that can be used to push data to a wide variety of clients, including web browsers, mobile applications, and smart devices. Lightstreamer’s unique adaptive streaming capabilities help reduce bandwidth and latency, as well as traverse any kind of proxies, firewalls, and other network intermediaries. Its massive fanout capabilities allow Lightstreamer to scale to millions of concurrent clients. It can connect to various data sources, including databases, message queues, and web services. Lightstreamer can also consume data from Apache Kafka topics and then deliver it to remote clients in real time, making it a good option for streaming data from a Kafka platform to multiple clients worldwide over the internet with low latency and high reliability.
For the demo presented in this post, we have used Amazon Managed Streaming for Apache Kafka (MSK). It is a fully managed service provided by AWS that makes it easy to build and run applications that use Apache Kafka. The service handles the heavy lifting of managing, scaling, and patching Apache Kafka clusters, so that you can focus on building and running your applications.
AWS MSK provides a high-performance, highly available, and secure Kafka environment that can be easily integrated with other AWS services. It allows you to create and manage your Kafka clusters, and provides options for data backup and recovery, encryption, and access control. Additionally, it provides monitoring and logging capabilities that allow you to troubleshoot and debug your Kafka clusters. It is a pay-as-you-go service, you only pay for the resources you consume, and you can scale the number of broker nodes and storage capacity as per your need.
The demo
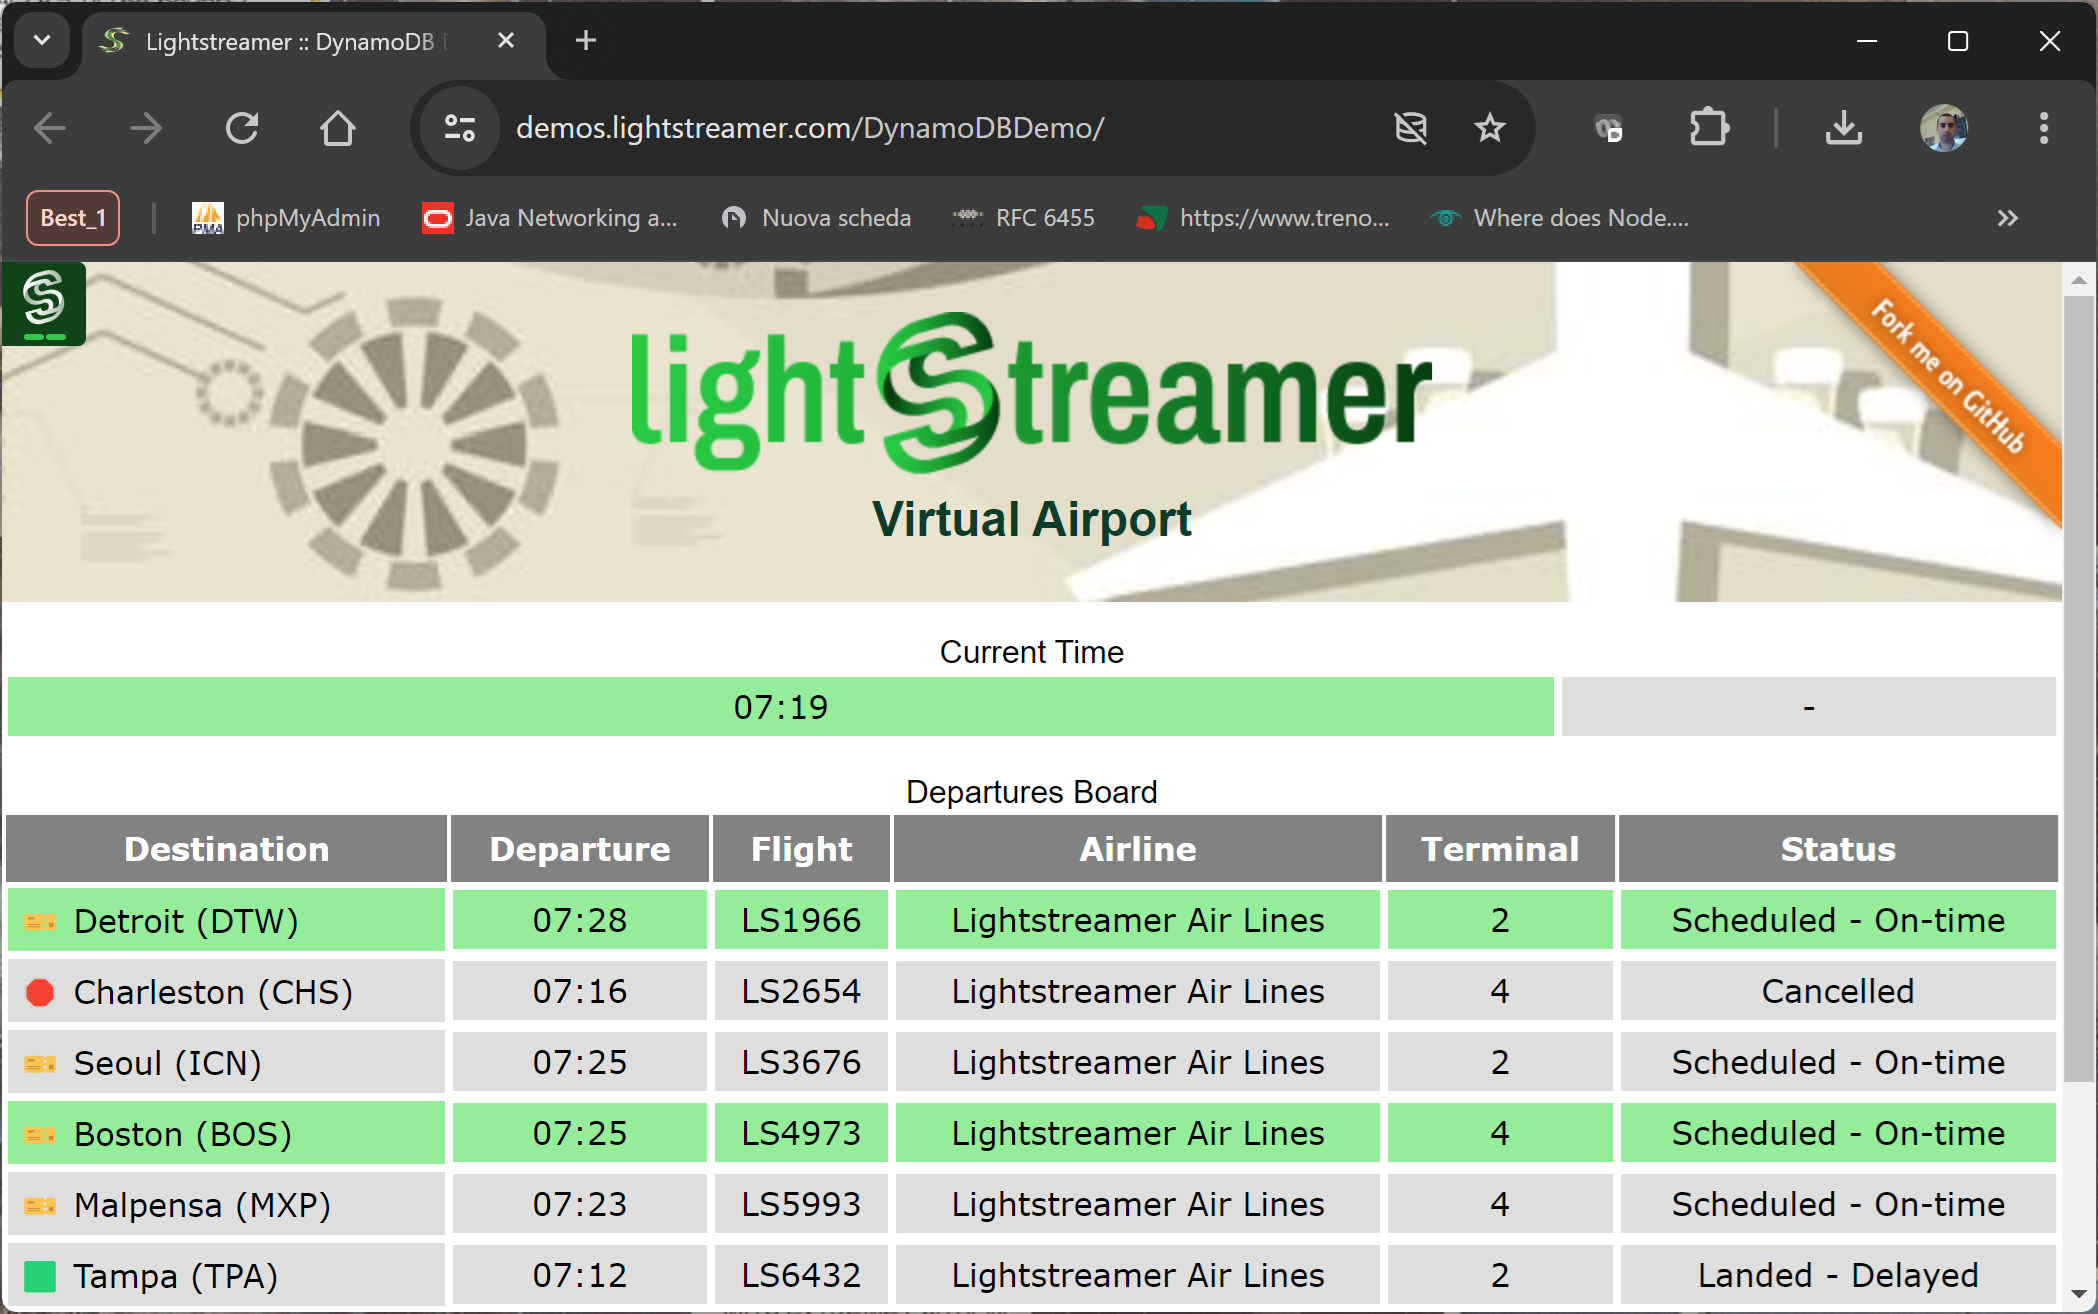
The Demo simulates a very simple departure board with a few rows showing real-time flight information to passengers of a hypothetical airport. The data are simulated with a random generator and sent to a Kafka topic. The client of the demo is a web page identical to the one developed for the demo retrieving data from DynamoDB.

The Demo Architecture
The overall architecture of the demo includes the element below:
- A web page using the Lightstreamer Web Client SDK to connect to the Lightstreamer server and subscribe to the flight information items.
- A Lightstreamer server deployed on an AWS EC2 instance alongside the custom metadata and data adapters.
- The adapters use the Java In-Process Adapter SDK; in particular, the Data Adapter retrieves data from the MSK data source through the Kafka clients API for Java.
- An MSK cluster with a topic named
departuresboard-001. - A simulator, also built in Java language, pushing data into the Kafka topic.
Adapter Details
The source code of the adapters is developed in the package: com.lightstreamer.examples.kafkademo.adapters.
The Data Adapter consists essentially of two source files:
- KafkaDataAdapter.java implements the DataProvider interface based on the Java In-Process Adapter API and deals with publishing the simulated flight information into the Lightstreamer server;
- ConsumerLoop.java implements a consumer loop for the Kafka service retrieving the messages to be pushed into the Lightstreamer server.
As for the Metadata Adapter, the demo relies on the basic functionalities provided by the ready-made LiteralBasedProvider Metadata Adapter.
Polling data from Kafka
In order to receive data from a Kafka messaging platform, a Java application must have a Kafka Consumer. The following steps outline the basic process for receiving data from a Kafka topic:
- Set up a Kafka Consumer
- Configure the Consumer
- Subscribe to a Topic
- Poll for data
- Deserialize and process the data
Below is a snippet of code from the ConsumerLoop class implementing the steps mentioned above.
    public void run() {
        Properties props = new Properties();
        props.setProperty("bootstrap.servers", kafkabootstrapstring);
        props.setProperty("group.id", kafkaconsumergroupid);
        props.setProperty("enable.auto.commit", "true");
        props.setProperty("auto.commit.interval.ms", "1000");
        props.setProperty("key.deserializer", "org.apache.kafka.common.serialization.StringDeserializer");
        props.setProperty("value.deserializer", "org.apache.kafka.common.serialization.StringDeserializer");

        try {
            KafkaConsumer<String, String> consumer = new KafkaConsumer<>(props);
            consumer.subscribe(Arrays.asList(ktopicname));
            while (goconsume) {
                ConsumerRecords<String, String> records = consumer.poll(Duration.ofMillis(7000));
                for (ConsumerRecord<String, String> record : records) {
                    logger.info("offset = " + record.offset() + ", key = " + record.key() + ", value = " + record.value());
                    if ( record.key().equalsIgnoreCase("current_time")) {
                        dapter.onCurrentTimeUpdate(record.value());
                    } else {
                        dapter.onNewMessage(record.key(), record.value());
                    }

                }
                logger.info("wait for new messages");
            }
            logger.info("End consumer loop");
        } catch (Exception e) {
            logger.error("Error during consumer loop: " + e.getMessage());
        }

    }
Once deserialized, a message from Kafka is passed to the Data Adapter and eventually pushed into the Lightstreamer server to be dispatched to the web clients in the form of Add, Delete, or Update messages as requested by the COMMAND subscribe mode. The below code implements the processing of the message.
    public static void onNewMessage(String key, String msg) {

        logger.info("onNewMessage: " +  key + " . " + msg);

        HashMap<String, String> update = new HashMap<String, String>();
        // We have to set the key
        update.put("key",  key);

        String[] tknz = msg.split("\\|");

        if ( keys.contains( key) ) {
            if (tknz[3].equalsIgnoreCase("Deleted")) {
                // delete
                logger.info("delete");
                update.put("command", "DELETE");
                keys.remove(key);
            } else {
                // UPDATE command
                logger.info("update");
                update.put("command", "UPDATE");
            }
        } else {
            // ADD command
            logger.info("add");
            update.put("command", "ADD");
            keys.add(key);
        }

        update.put("destination", tknz[0]);
        update.put("departure", tknz[1]);
        update.put("terminal", tknz[2]);
        update.put("status", tknz[3]);
        update.put("airline", tknz[4]);

        listener.update("DepartureMonitor", update, false);
    }
The data reception from Kafka is triggered by the subscribe function invoked in the Data Adapter when a client subscribes for the first time to the items of the demo; specifically, in the KafkaDataAdapter.java class, we have the following code:
    public void subscribe(String itemName, boolean needsIterator) throws SubscriptionException, FailureException {

        logger.info("Subscribe for item: " + itemName);

        if (itemName.startsWith("DepartureMonitor")) {
            consumer = new ConsumerLoop(this, kconnstring, kconsumergroupid, ktopicname);
            consumer.start();
        } else if (itemName.startsWith("CurrTime")) {
            currtime = true;
        } else {
            logger.warn("Requested item not expected.");
        }

    }
The Simulator
The data shown by the demo are randomly generated by a simulator and published into a Kafka topic. The simulator generates flight data randomly, creating new flights, updating data, and then deleting them once they depart. To be precise, the message sent to the topic is a string with the following fields pipe separated: “destination”, “departure”, “terminal”, “status”, and “airline”. The key of the record is the flight code with the format “LS999”.
Putting things together
The demo needs a Kafka cluster where a topic with name departuresboard-001 is defined. You can use a Kafka server installed locally or any of the services offered in the cloud; for this demo, we used AWS MSK, which is precisely what the next steps refer to.
AWS MSK
- Sign in to the AWS Console in the account you want to create your cluster in.
- Browse to the MSK create cluster wizard to start the creation.
- Given the limited needs of the demo, you can choose options for a cluster with only 2 brokers, one per availability zone, and of small size (kafka.t3.small).
- Choose Unauthenticated access option and allow Plaintext connection.
- We choose a cluster configuration such as the MSK default configuration but a single add; since in the demo only real-time events are managed, we choose a very short retention time for messages: log.retention.ms = 2000
- Create a topic with name departuresboard-001.
Lightstreamer Server
- Download Lightstreamer Server (Lightstreamer Server comes with a free non-expiring demo license for 20 connected users) from Lightstreamer Download page, and install it, as explained in the GETTING_STARTED.TXT file in the installation home directory.
- Make sure that Lightstreamer Server is not running.
- Get the deploy.zip file from the latest release of the Demo GitHub project, unzip it, and copy the kafkademo folder into the adapters folder of your Lightstreamer Server installation.
- Update the adapters.xml file setting the “kafka_bootstrap_servers” parameter with the connection string of your cluster created in the previous section; to retrieve this information use the steps below:
- Open the Amazon MSK console at https://console.aws.amazon.com/msk/.
- Wait for the status of your cluster to become Active. This might take several minutes. After the status becomes Active, choose the cluster name. This takes you to a page containing the cluster summary.
- Choose View client information.
- Copy the connection string for plaintext authentication.
- [Optional] Customize the logging settings in log4j configuration file kafkademo/classes/log4j2.xml.
- In order to avoid authentication stuff, the machine running the Lightstreamer server must be in the same vpc of the MSK cluster.
- Start Lightstreamer Server.
Simulator Producer
From the LS_HOME\adapters\kafkademo\lib folder, you can start the simulator producer loop with this command:
$java -cp example-kafka-adapter-java-0.0.1-SNAPSHOT.jar:kafka-clients-3.2.2.jar:log4j-api-2.18.0.jar:log4j-core-2.18.0.jar:lz4-java-1.8.0.jar:snappy-java-1.1.8.4:slf4j-api-2.0.1.jar com.lightstreamer.examples.kafkademo.producer.DemoPublisher boostrap_server topic_nameWhere bootstrap_server is the same information retrieved in the previous section, and the topic name is departuresboard-001.
Web Client
As a client for this demo, you can use the Lightstreamer – DynamoDB Demo – Web Client; you can follow the instructions in the Install section with one addition: in the src/js/const.js file, change the LS_ADAPTER_SET to KAFKADEMO.
To Recap
- The client-side full source code can be found in this GitHub project: https://github.com/Lightstreamer/Lightstreamer-example-DynamoDB-client-javascript.
- The server-side full source code can be found in this GitHub project: https://github.com/Lightstreamer/Lightstreamer-example-Kafka-adapter-java.
- Here is the official AWS page for MSK: https://aws.amazon.com/msk/.


